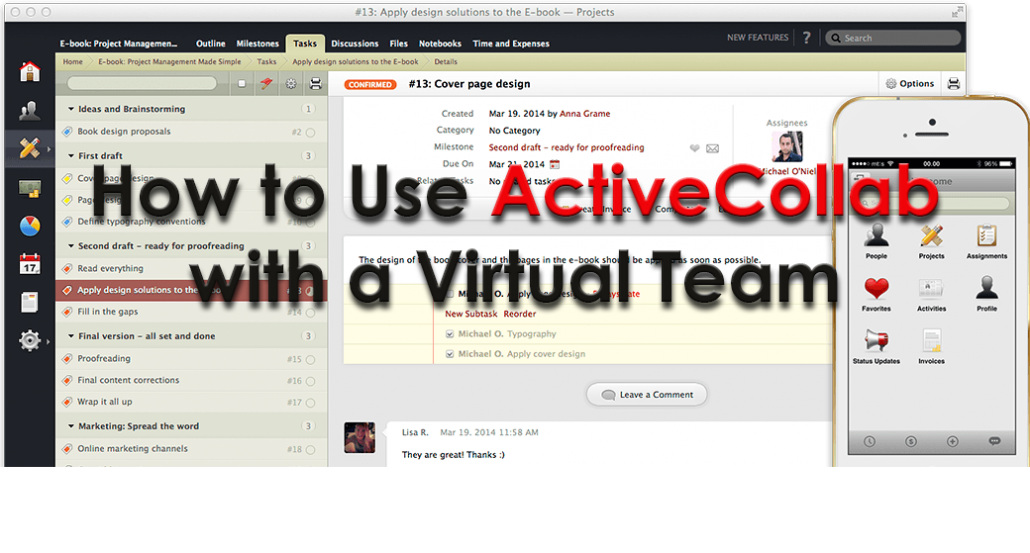
The purpose of this tutorial is to show how to use ActiveCollab to create and manage tasks, along with collaborating with the team to maximize efficiency and accountability.
Login URL: http://projects.vastaffer.com or https://projects.vastaffer.com/ac5
First, thank you so much for choosing to work with VA Staffer – we strive to deliver the absolute best Virtual Assistant Services to allow you grow your business. We want to make communication with us the simplest and most effective possible. In doing so, we are inviting you to our Visual Project Management Tool as a valued client with us.
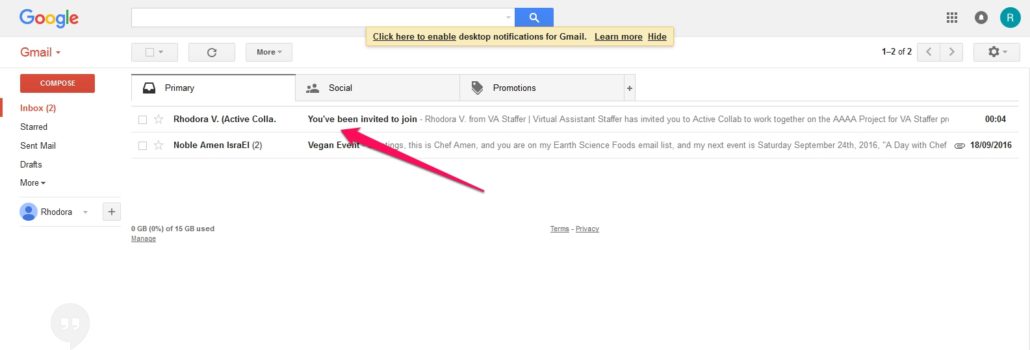
In your email, you will see the invitation link to join the Project Management tool that VA Staffer sent to you. Please use this to access our portal.
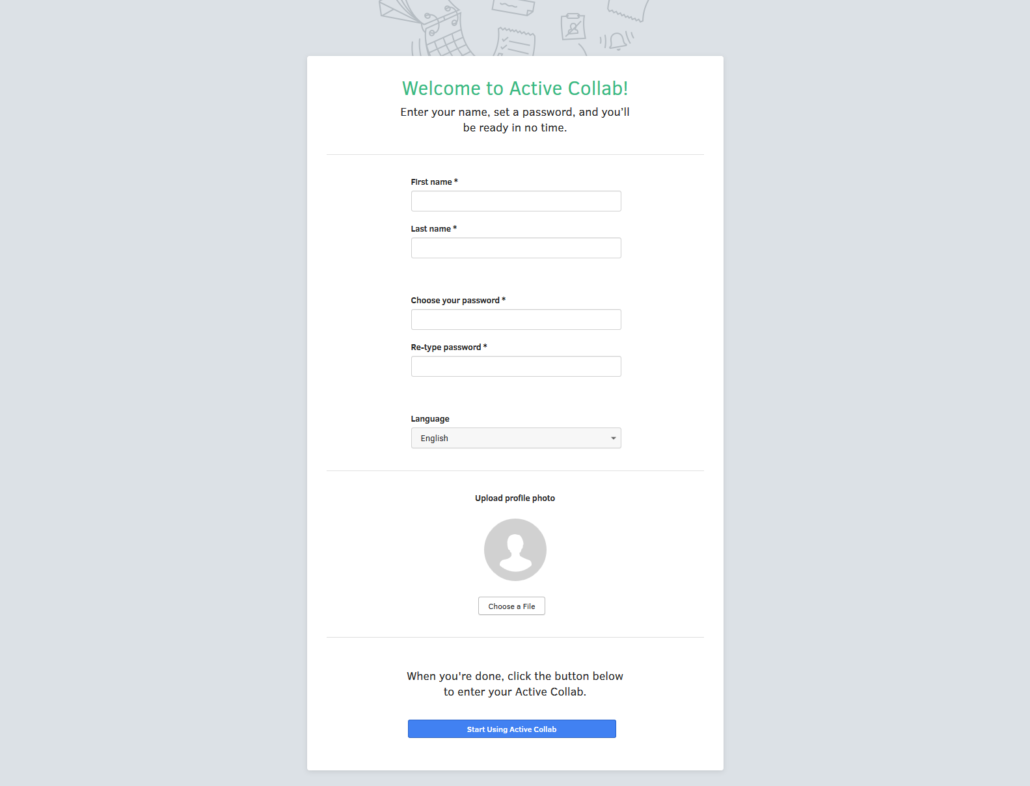

If you are a new client you will be prompted to the sign-up page to fill out personal and login information.
Start Using our New and Improved Project Management tool!
If you are an existing client you can use your login credentials that you are used with the previous version of our Project Management tool. You will be prompted to the login page. Please enter username and password and sign in!
Login URL: http://projects.vastaffer.com or https://projects.vastaffer.com/ac5
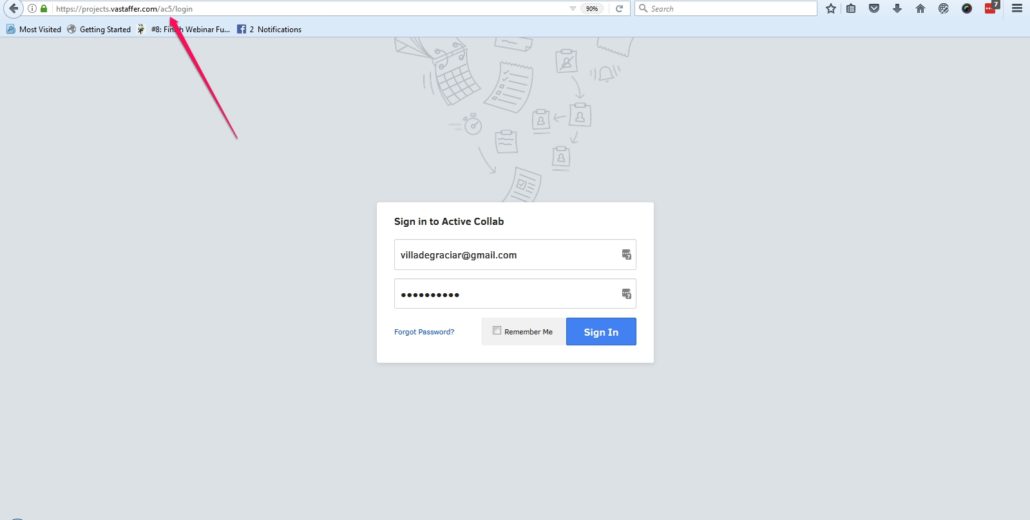
Below is your VA Staffer Projects Home Screen after Logging in
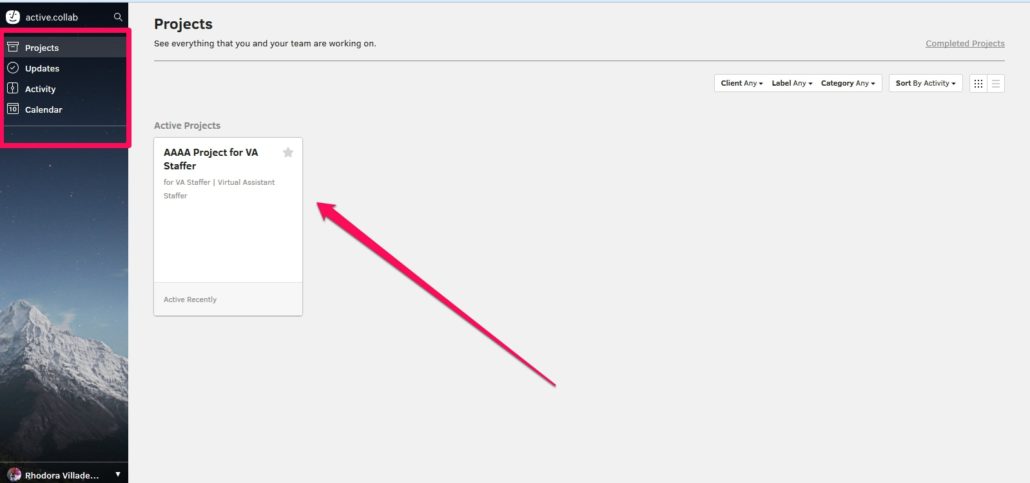
For example purposes. The above picture is your Home page where you will see all your tasks and anything about your project. You will see that you have Projects, Updates, Activity and Calendar to navigate throughout the page.
To add a new task first you need to click the Projects Icon and you will see the page below. Below is the “Tasks” page without any task on it, you’ll notice “tabs” on the top of the project with different options for your projects. Time to make your first “new task“!
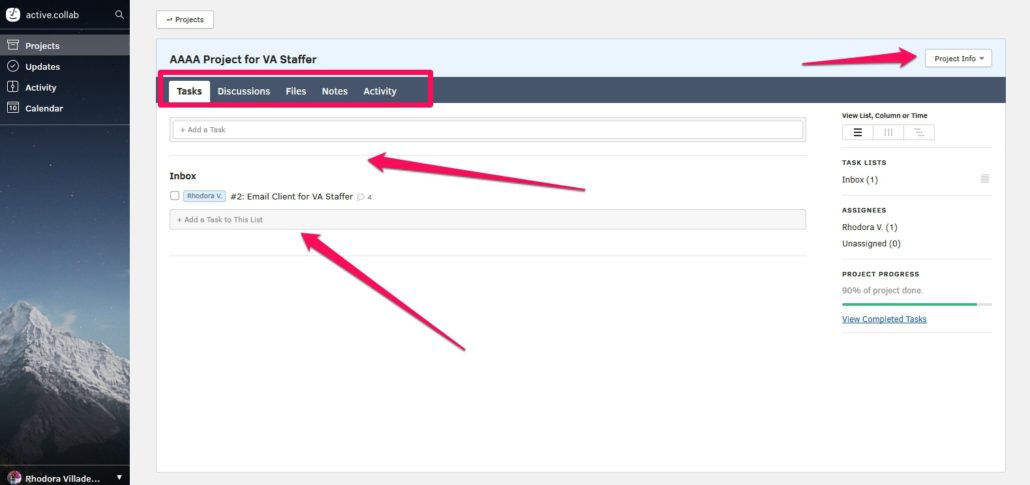
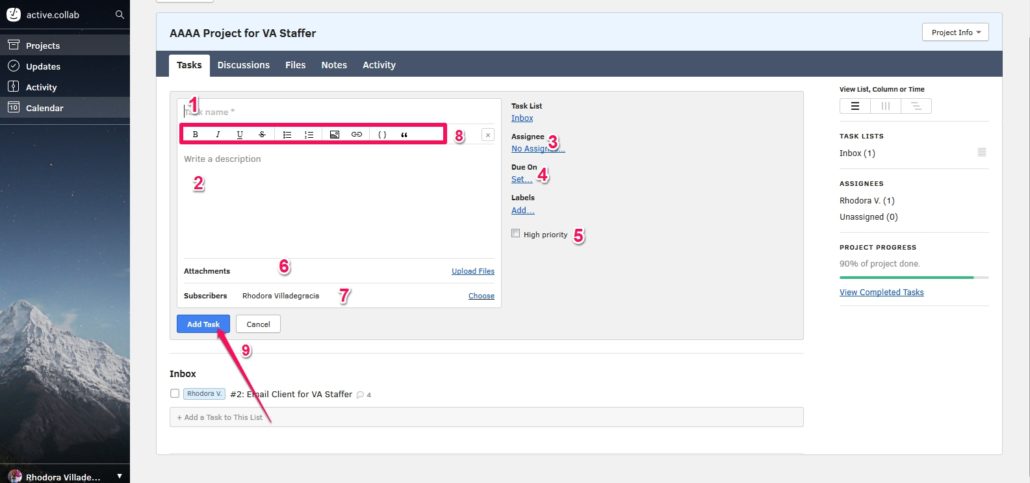
To make a new task you need to click the “Add a task” button on the top and bottom parts of the TASK page. After clicking the “add a task” button this is the page that should be on your screen. The Add a Task Dialogue Box.
Below you will see a breakdown of the features and how to properly create and assign a task in the Visual Project Management tool.
1. Title – Here you can put the Title/Name of the task.
2. Task Description -The Body of the Task is where you include the instructions that tell us what you’re trying to achieve so we can delegate to our team accordingly. You can also include links to websites, shared folders like google drive, one drive etc. or YouTube.
3. Task Assignee – Obviously this is where you can assign who you want to be responsible for the task. Always select Cavika or Rhodora for all new tasks. They are the project coordinators and they delegate your task to the best suited VA on the team.
4. Task Due date – Here you can select the date you need the task completed by.
5. High Priority – Click the checkbox if the Task is High Priority / Urgent
6. File Attachment – Here you can attach any documents that our virtual assistants will need to execute the task.
7. Subscribers – People you who need to be notified on this task. Please select Cavika, Rhodora, Tana, Jeff and yourself,
8. Submit – After populating the needed fields on the add a task page click “Add Task” and you’re all done!

Congratulations! When you add your task you will see an overview of the task that you have created like below. When you created the task, anyone you notified on the subscription part upon creating the task will also receive a new email alerting them that a new task has been created.
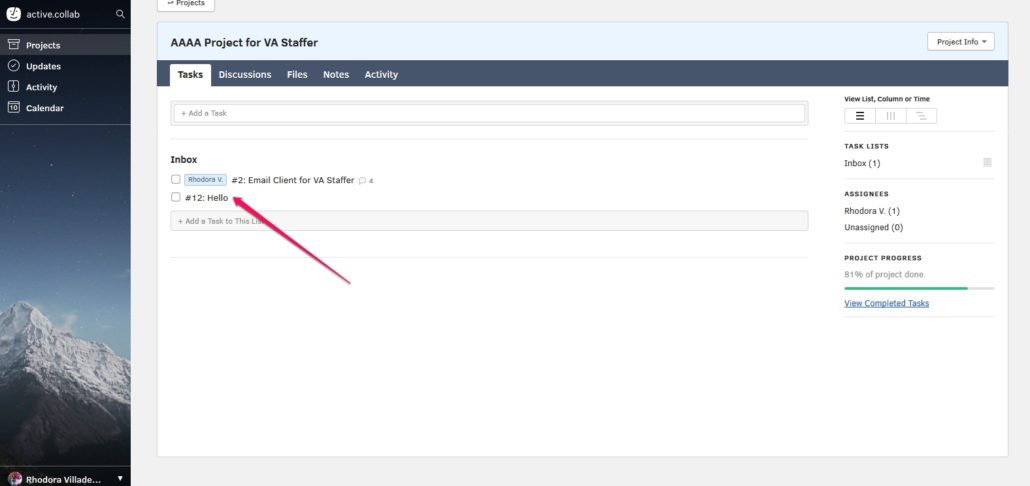
You can see that the task that you have created is now listed in the TASK section of the Page.
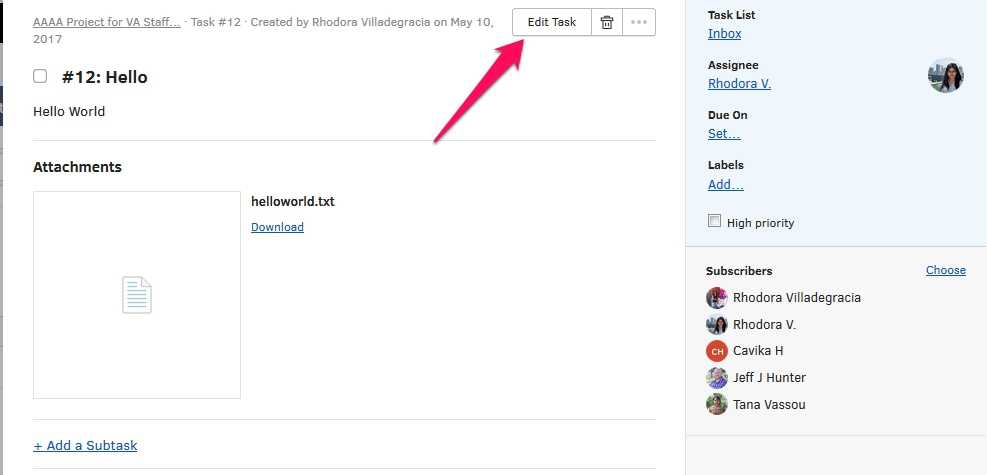
If you want to make some changes you can click the “Edit Task” button in the upper right corner of the Task that you have created.
After doing your first task for your VA you can see in your Activity / Updates pages the task that you have created and you can click that right away to go to that particular task.
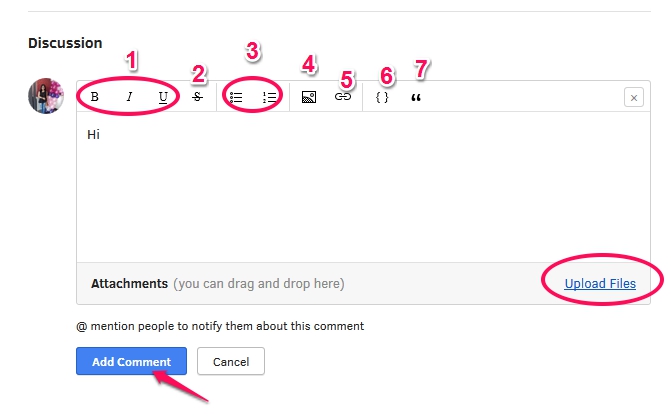
You can also leave a comment under the task that you have created. You can provide feedback about a completed task or task in progress. You can also attach additional files that are related to said task. This software also integrates with your email and all notifications are sent via email. To post an update or comment to a task, you can simply reply via email and it will be posted to our Project Tool (PMT) automatically along with any attachments included.

Below you will see a breakdown of the features of the comment box.
1. Format your comment bold, italic and underline
2. Cross out words and sentences
3. If you need to list any points or values
4. Insert image into a comment
5. Hyperlink
6. If you need to paste source code
7. If you need to quote words or sentences
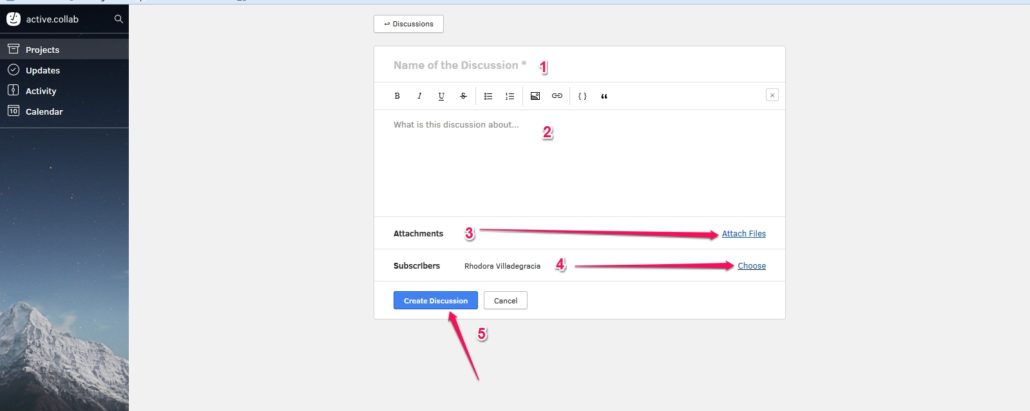
Creating a Discussion – This where you can put any suggestions for us to improve our processes, concerns regarding tasks, inquiries about future projects that you want to delegate to VA Staffer or anything you’d like to discuss that is not related to an existing task. Let’s talk!
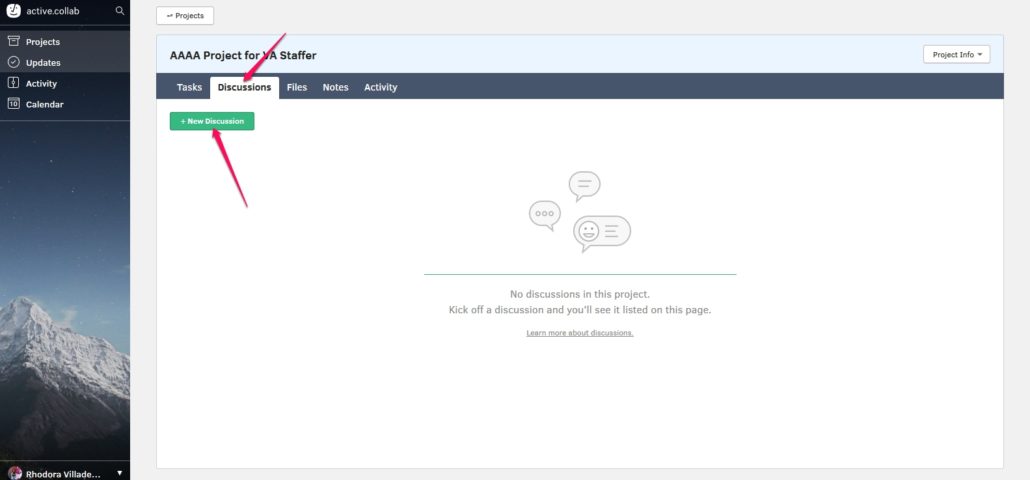
Click “New Discussion” button to add a new discussion.
Below you will see a breakdown of the features of the Discussion box.
1. Title / Name / Topics that you want to discuss.
2. Description / Detailed info about the topics that you want to discuss.
3. If you need to attach documents, images and other files related to the discussion that you want to start.
4. People you want to be notified or see the discussion that you’ve created.
5. When done please hit the button “Create Discussion”.
All Done!
Files Section – This is where all the files that have been uploaded to your project will automatically be here in this section. If you want to upload some files needed for your task you can also do that here just click the button “Upload Files”
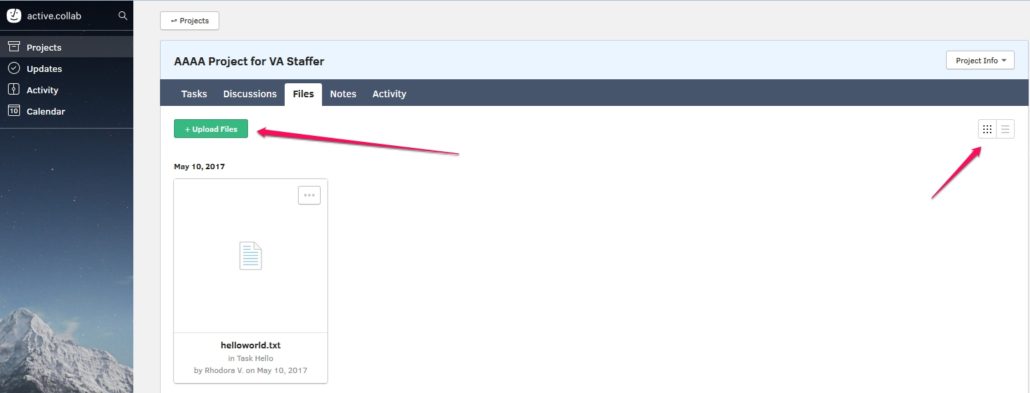
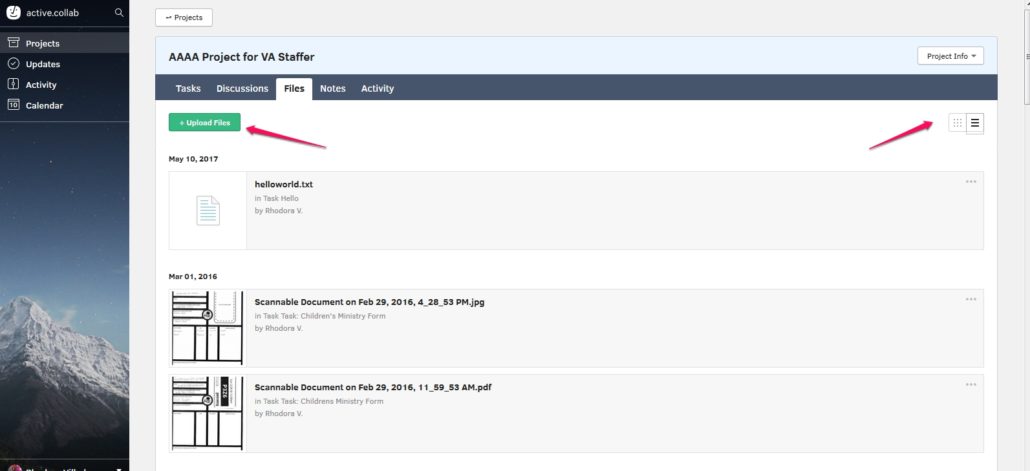
You can change the layout view. Check the screenshot above.
Or like this – List View Option

You can also download the files, get the link to the file or delete them.
Notes Section – This is where you can create notes, then let others make edits and leave comments. Every change is saved and you can see the full revision history anytime.
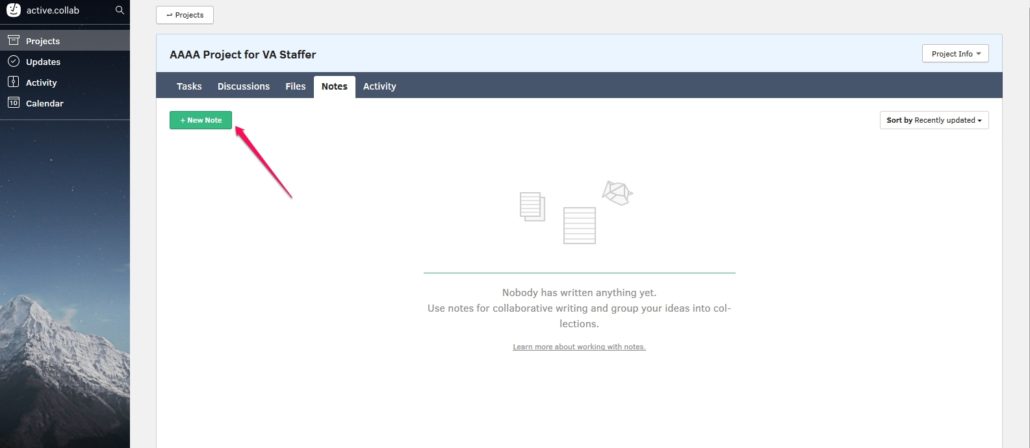
Just click the button “New Note” to create one. We usually use this for sharing credentials since login credentials can always be updated this is the right place to store them within your project so we can share with our team accordingly.
The most secure option to share credentials with our team is by creating a LastPass account – http://ityurl.com/lastpass. Here is the tutorial on how to share credentials with our virtual team – https://vastaffer.com/share-lastpass-password-virtual-assistant/. We use this with all our clients.
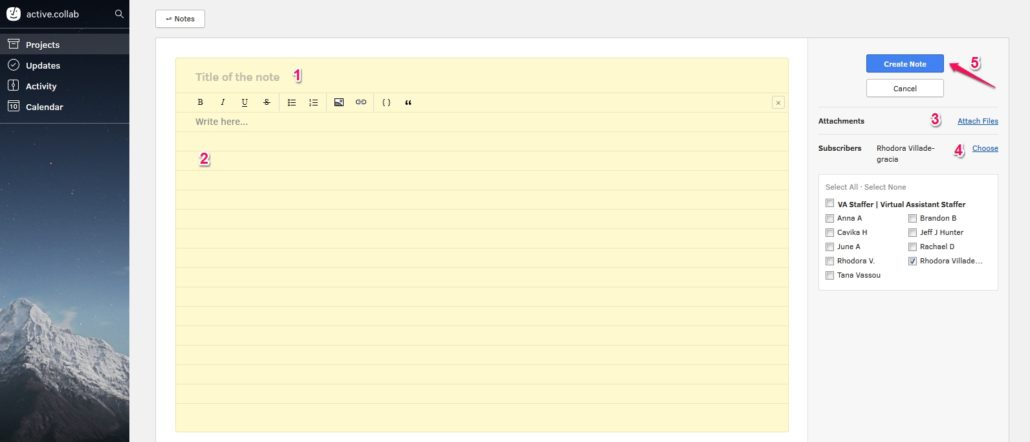
Below you will see a breakdown of the features of the Notes page.
1. Title / Name / Topics of the Note.
2. Description / Detailed info about the note.
3. If you need to attach documents, images and other files related to the Note that you want to start.
4. People you want to be notified or see the Note that you’ve created.
5. When done please hit the button “Create Note”.
All Done!
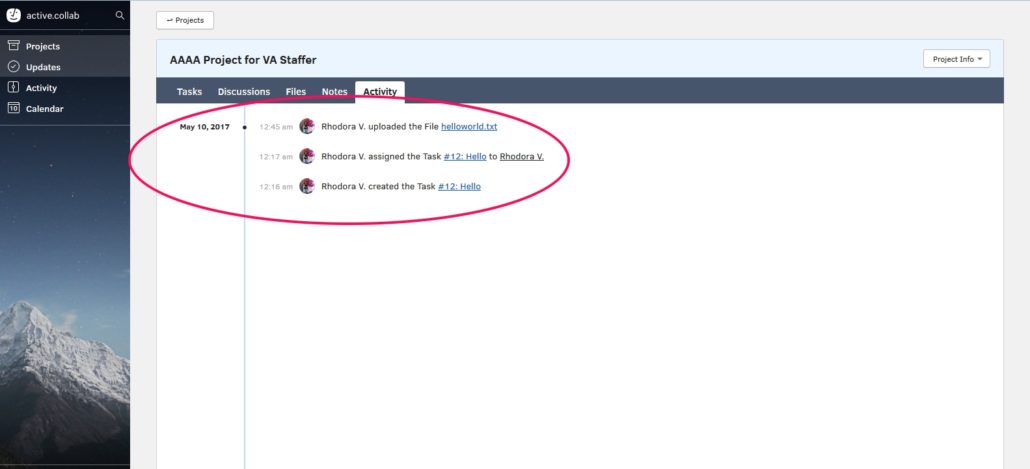
Activity Section – It’s the place to track updates what has been happening on your projects on a given day.
That’s It! Very Easy, Right?! I hope you found this helpful and useful.
Now you should know how to use ActiveCollab also known as our “Project Management Tool / PMT”

Rhodora V.
Lead Solutions Coordinator
TAKE BACK YOUR TIME!
Our team can save you a ton of time and energy that can be better spent elsewhere.
You know that already, that’s why you’re here!

