How to Use an Autoresponder for Intelligent Email Marketing
Sometimes you want to set your business on automatic or semiautomatic for intelligent email marketing. It’s a great practice especially when you need to grow another area of the business or you’re repeating the same steps over and over. Automating allows you to do an initial setup and then let a process run for you as you continue to focus on business growth.
In this post, I’m using AWeber and OptimizePress to show you how to use an autoresponder for intelligent email marketing:
Tools Required:

Email Automation by >> Aweber here <<

Landing Page Optimization for forms by >> OptimizePress 2.0 here <<
Here we go! How to use an autoresponder to:
- Create a list
- Create a message
- Correctly insert links in your emails
- Test your email
- Add drafts to the follow up series
- Create broadcast email
- Put an opt in form on your website
- Create Automation Rules so you can keep your marketing focused
With any process, you need to make sure you’ve determined the end goal. This particular post will take you through the steps you need to get people on your prospect and client list. Further, you’ll want to continue to market to those lists accordingly.
1) CREATE A LIST
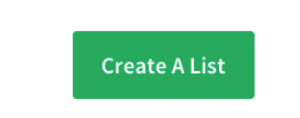
When people hit your landing page or your website, you want to ask for their info and identify that group of people in the AWeber list.
Sign into your AWeber and from your Manage Lists menu, at the top of the Home Page you’ll see the “Create A List”
You’ll then be taken on a step-by-step process showing you how to use an autoresponder to create your first list.
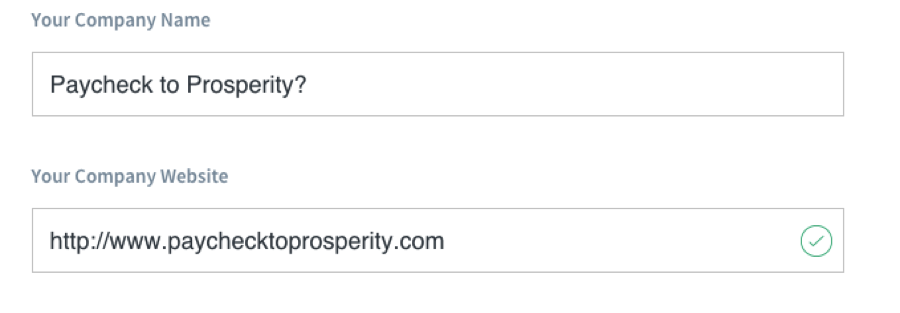
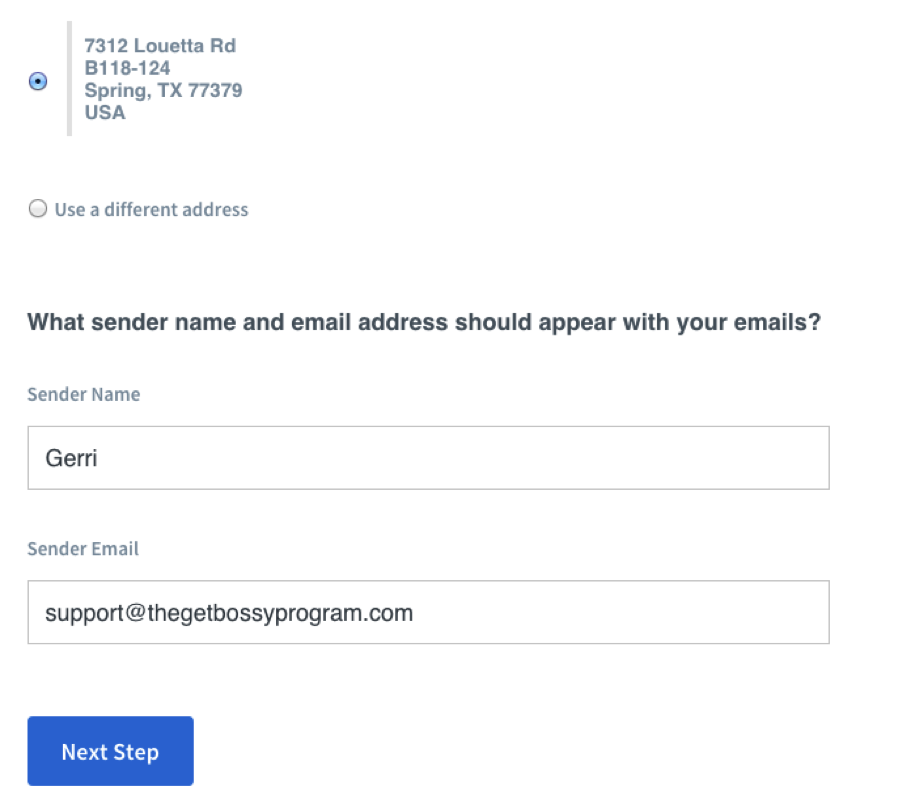
Check your company name and website, address – which may or may not be a physical address, in this case, mine is a PO Box. Then make sure your name and contact email is correct at the bottom. This info will default, so change it if necessary. Then hit “Next Step”.
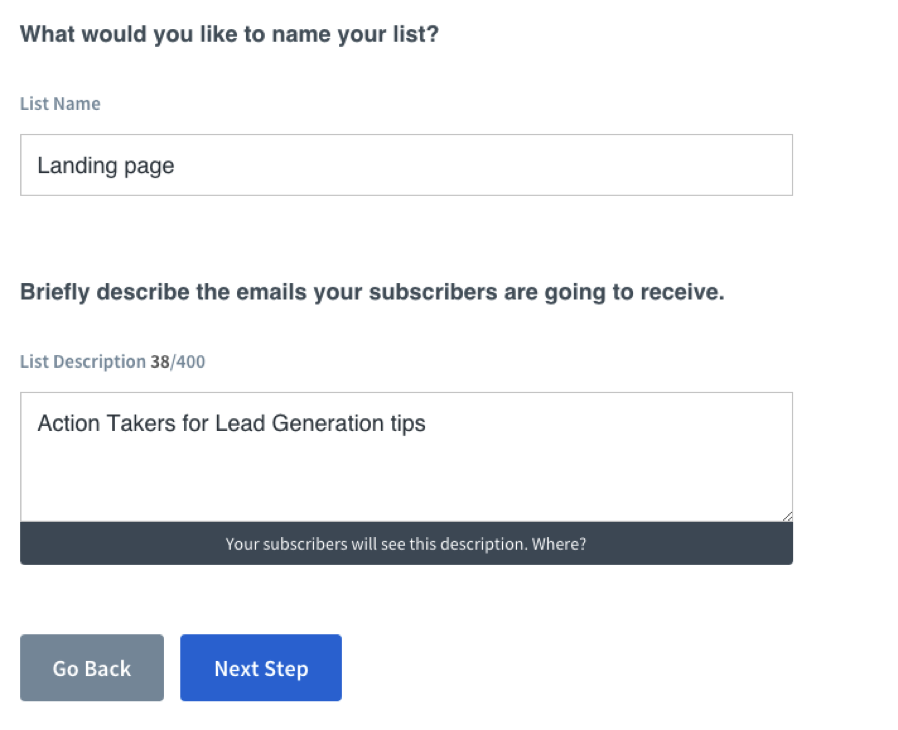
The List Name will be seen by you when you look at your lists. The List Description will be seen by your email recipients when you email them, so make sure it accurately describes what they opted in for.
I named this “Landing Page” to use as an example but you’ll want to be more descriptive because you may have several Landing Pages. In this case, I was going to do a Lead Generation Lead Magnet, so that’s what I want to call this list. That way my email recipients will keep in mind why they’re receiving my emails.
After you hit “Next Step” you’ll want to choose a “Subject Line”. This will appear when you want your email recipients to confirm their email. It’s the double opt in rule. I usually customize mine, but they have some prewritten for you.
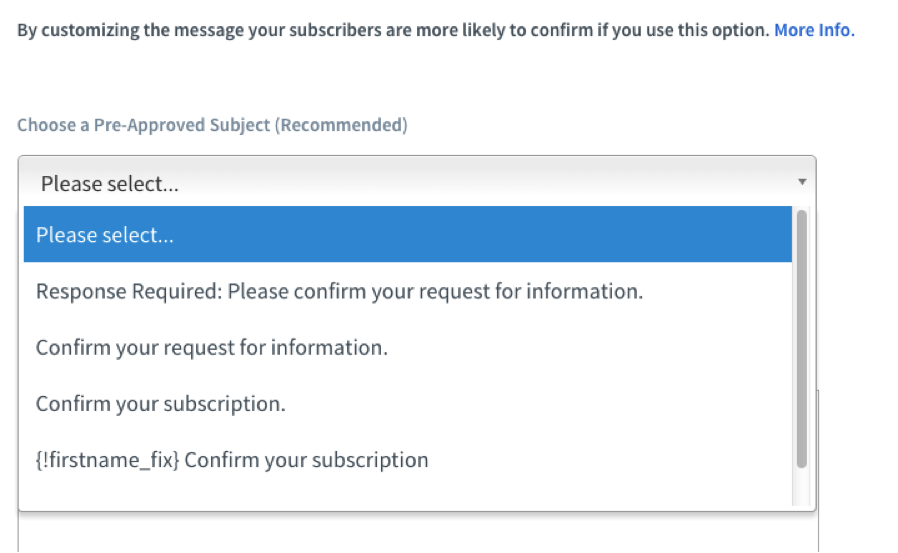
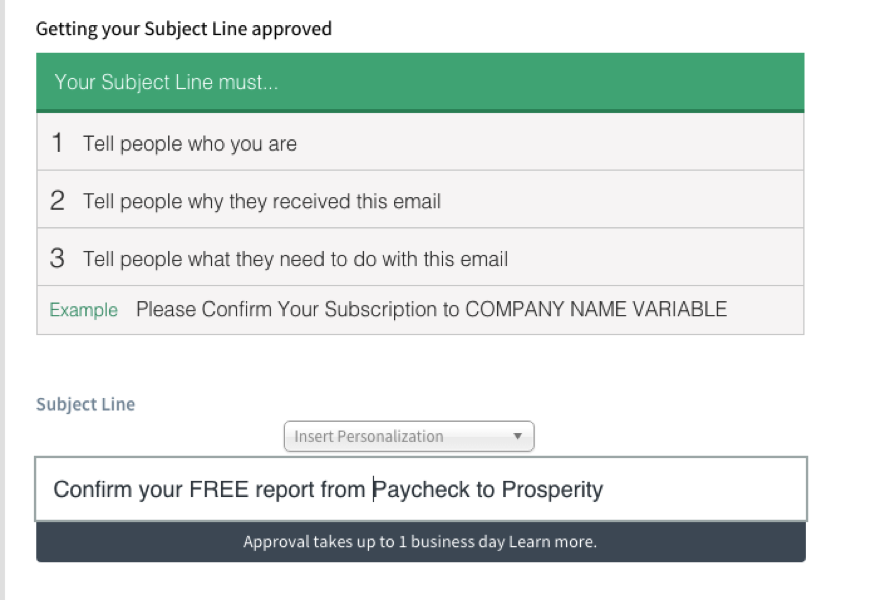
If you choose to make yours a little more personalized, then you can follow their requirements and my example below. Using a Customized Subject Line seems to get more opens because it identifies you right there in the subject line.
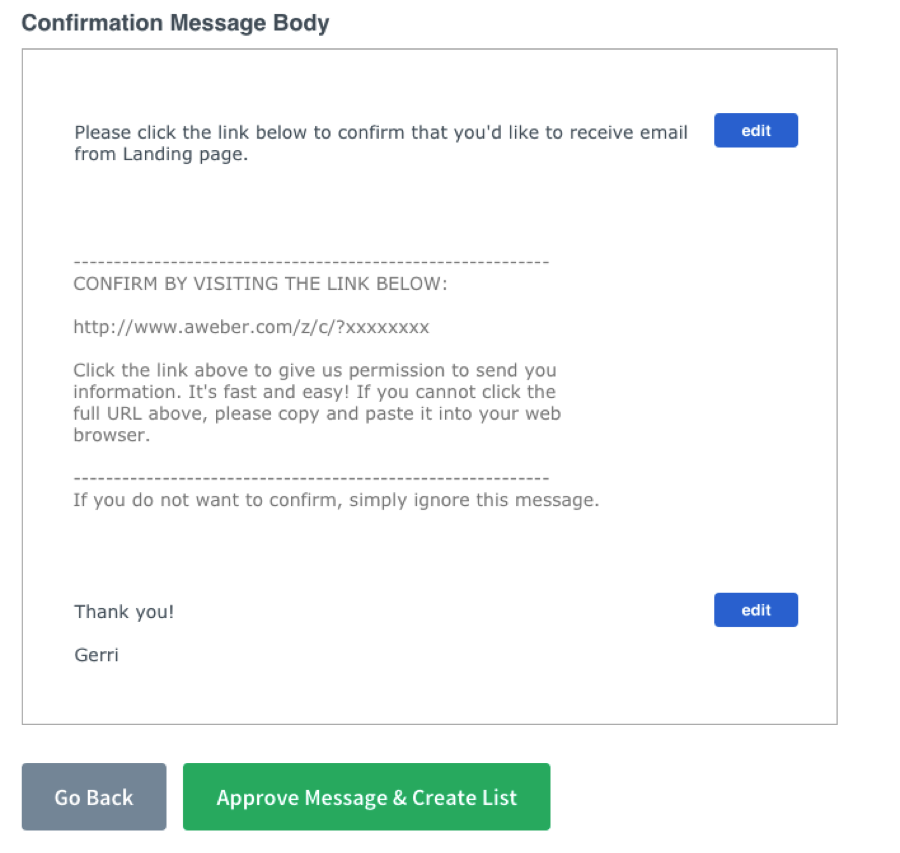
Further down you’ll be able to construct the Confirmation Email body verbiage that will be sent.
2 areas you need to be aware of:
The 1st sentence will default to your List Name – change that! You want your business name or your name.
The 2nd thing is your salutation. This is where you can personalize it and it’ll show on all the emails sent so you can keep it consistent with your subsequent follow up emails.
This first screen shot is the default…
This is the new version in which I changed the “email from” area I mentioned above.

You can also use the default “Insert Personalization” if you’d like for AWeber to pull that info in for you.

This is the second area I changed up at the bottom. I added my phone number so people can reach me right away if they choose. You can add whatever you wish in your salutation for the Confirmation Email.
Now, after you’ve completed your List, you’ll want to create your first follow up message.
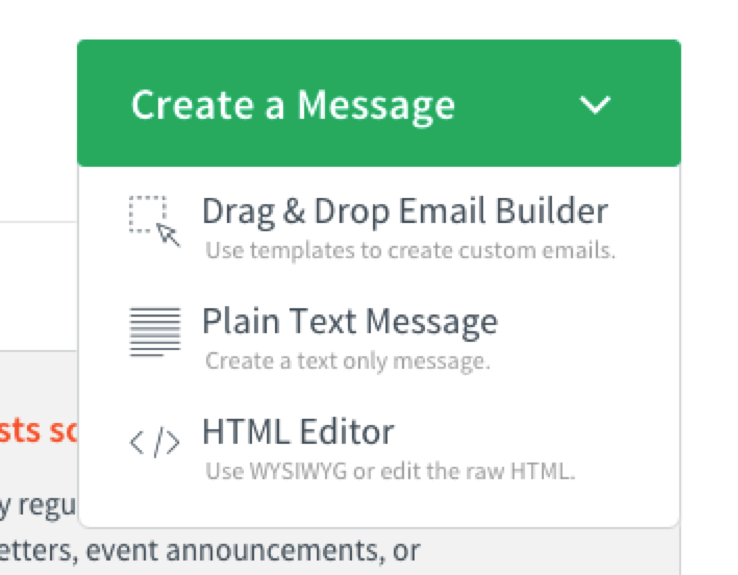
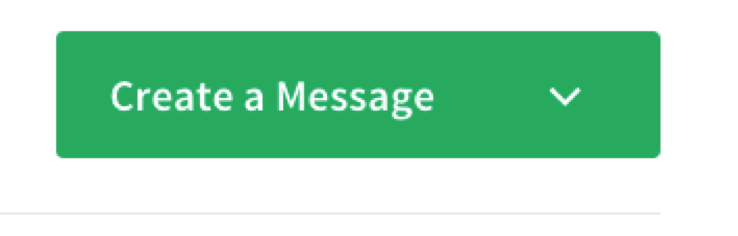
2) HOW TO USE AN AUTORESPONDER TO CREATE A MESSAGE
I use the Drag & Drop Email Builder because it gives you all the tools you need to create a really great looking email right there in AWeber.
When your email page comes up, you can start filling in the email detail. This will be the email that is sent to your Confirmed email recipients.
I usually begin with my first follow up email so they can be done in order.
Start with your “Subject Line”. There’s been research on which type of subject line gets the most opens, which is what you want. Don’t assume that just because the email comes from you, which people clearly opted to receive, that they will open it.
People receive tons of emails and if you’re not priority to them, then it will get lost in their inbox.
For some great tips on email subject lines, check on the AWeber Hangout.

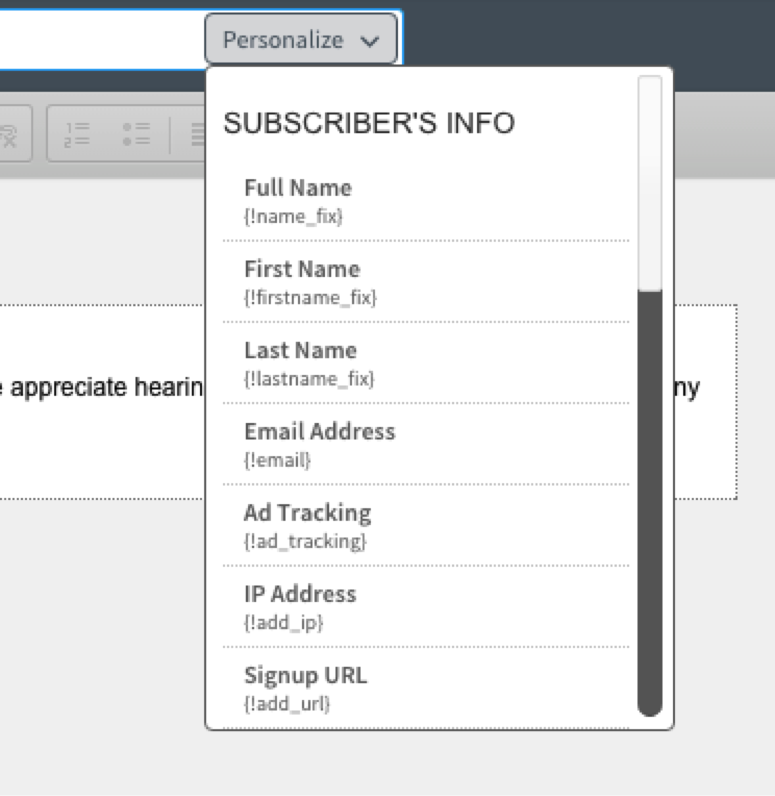
I like to throw a personalization in every once in a while.
The Personalization you choose will cause that information (as long as you asked for it and received it from the email recipient on your optin box) be pulled in automatically by AWeber.
Now, I could go through all of the templates, but honestly you’ll have to choose the one that best fits the purpose and tone of your email and audience. At a minimum, I suggest using the same template with your logo throughout all the emails so you establish brand recognition and does not make your audience guess who you are. Once you find one you like, it can be saved in Templates and used every time.
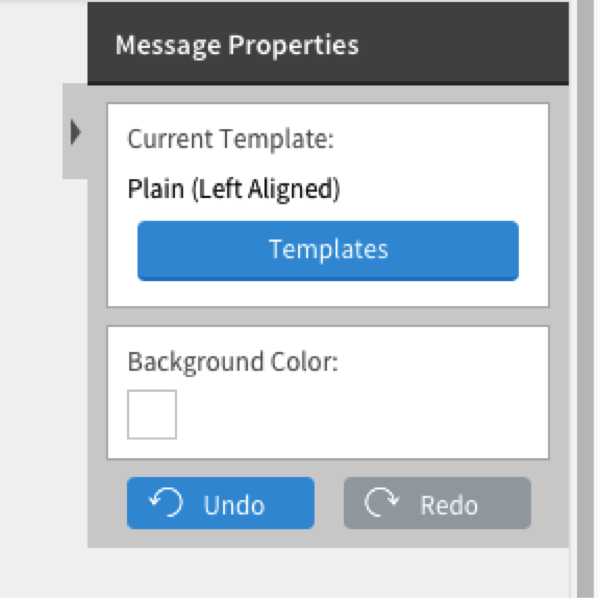
Either that, or you could just use simple white with no template and your logo or consistent Salutation.
Some of the top Internet Marketers use plain white and I haven’t read any convincing evidence or see any statistics that show greater click rates on your CTA (which is what you want to accomplish and is the only thing measurable within the email) with pretty and busy vs. plain and white.
The choice is completely up to you.
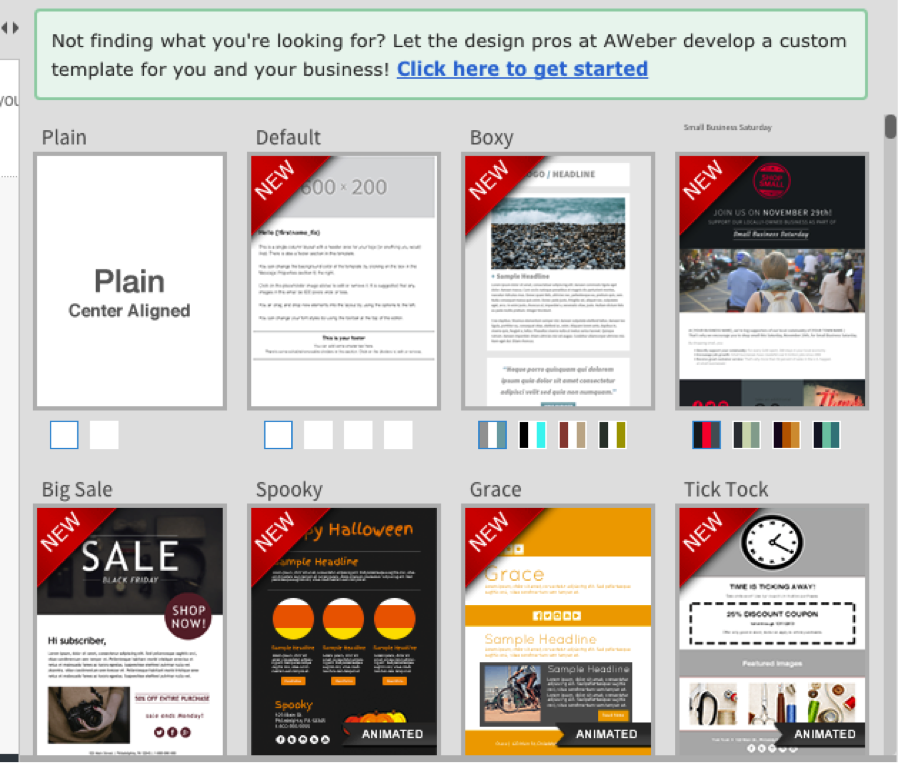
So for our example purposes, I’ve chosen to use the plain and white to illustrate the steps you’ll go through to construct the email.
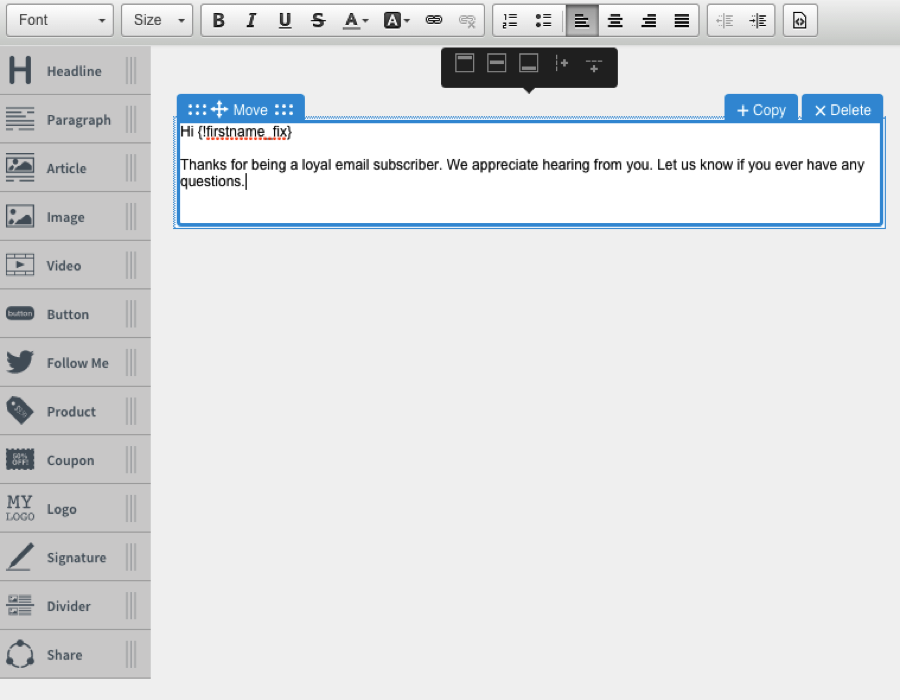
Click into the text box and you’ll find it’s very similar to the Word format and functionality and look and feel.
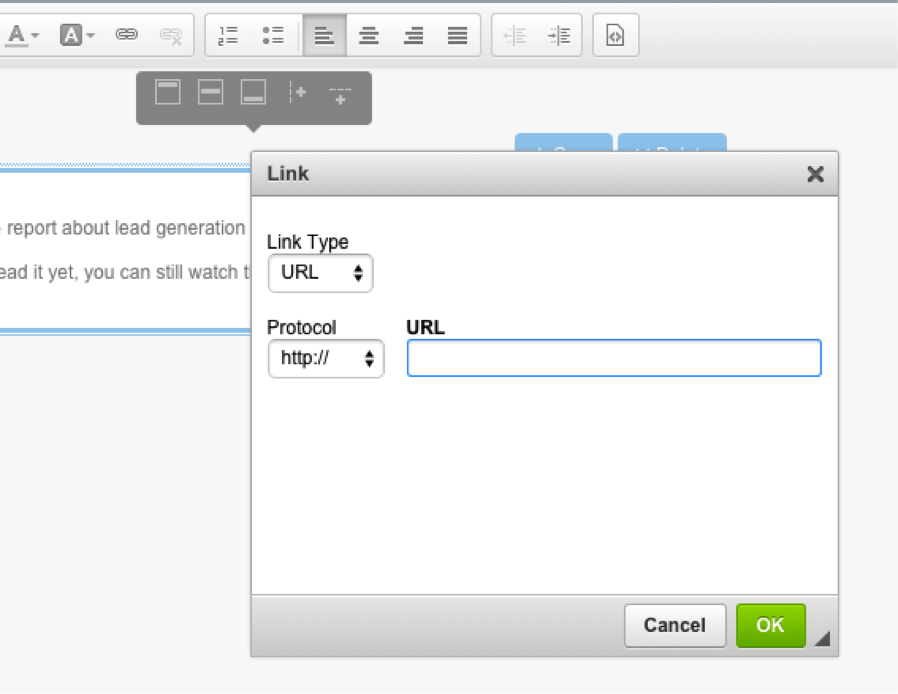
3) Correctly insert links in your emails
Remember to ask yourself, “Why am I sending this and what do I want people to do?” Graphics are good and you’ll always want some type of CTA. As you create your CTAs you’ll want to determine whether you want people on a different list now that they’ve shown interest in another subject you’ve introduced to them. I’ll show you how to use List Rules further down.
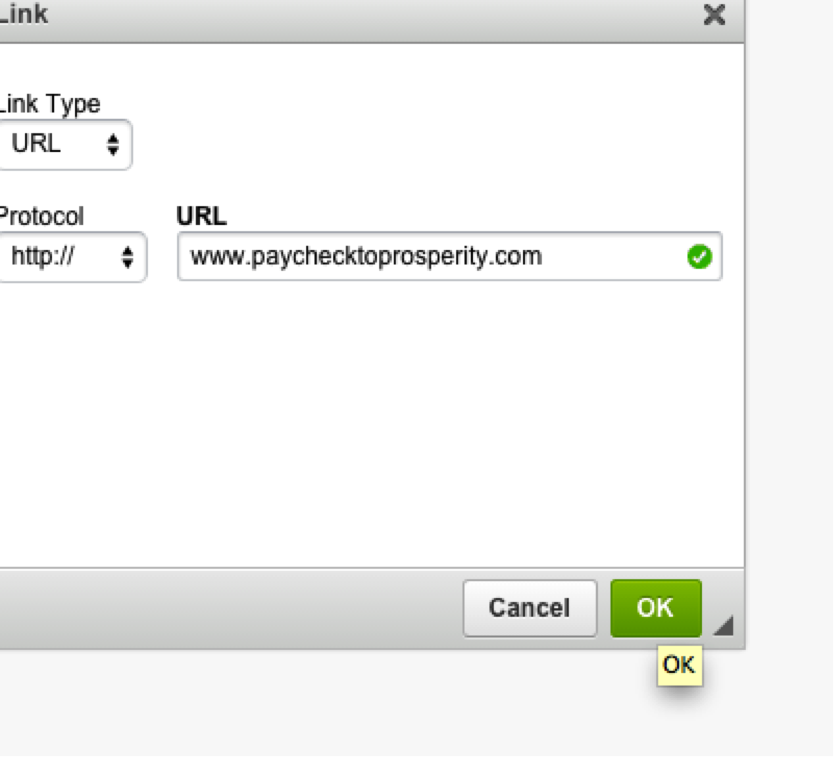
If you’re going to take them to another opt in page or website, you can highlight the words you want to use for the link and hit your “hyperlink” icon button. The Link box will come up and you can enter your info there. It will automatically check to see if it’s a good url. You can use url shorteners here such as bit.ly.com but sometimes it raises your spam score so you want to limit them. I only use bit.ly links if I have 2 links in the email which is NOT common.
Some tips:
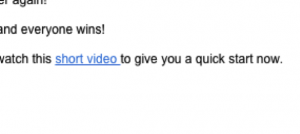
You do want to perhaps put several of the same links within different verbiage to appeal to different types of people and moods?
For instance, “Click HERE” and “Check out the FREE video”. You could also use the actual video name or campaign name as an entire link. “Landing Pages and Their Essential Components” could be the entire link. Test them all out and do what works best according to your analytics.
However, don’t make it a habit of putting in more than 1 hyperlink with different CTAs – you don’t want people to get confused or shut down with too many choices and do nothing. Your hyperlinks under the text should be the same.
After all of your info is entered and your links are checked and fine, Save & Exit.
One note, AWeber doesn’t play nice with Safari but you can work with it in Chrome or Firefox just fine.

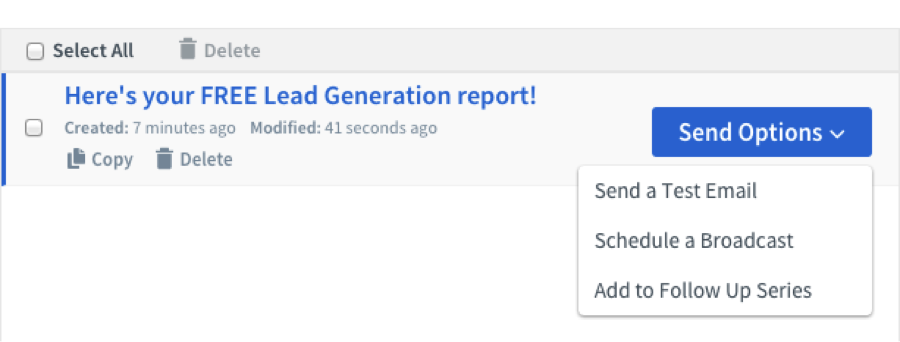
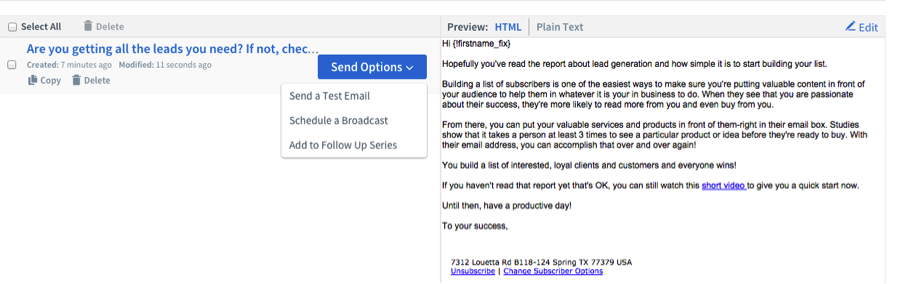
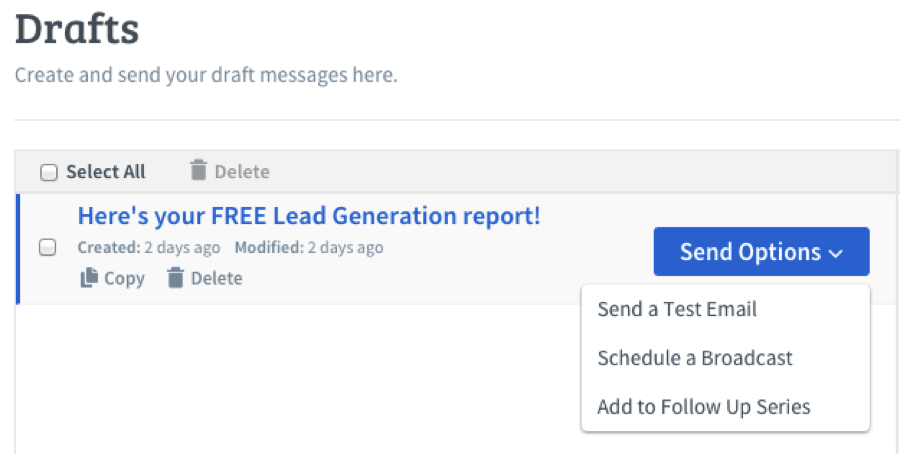
After you Save it will go into your Drafts. This is a new feature with AWeber so I’ll walk you through getting it into your follow up sequence.
4) Test your email
Before you stick it into your follow up sequence, you want to test it while it’s still in the Drafts which is where you’ll edit it should there be something missing or not looking as good as you want.
Go to your Send Options and click Send a Test Email.
Enter the email address to which you want the email sent. Sometimes I’ll send it straight to my copywriter/editor to check the content and format.
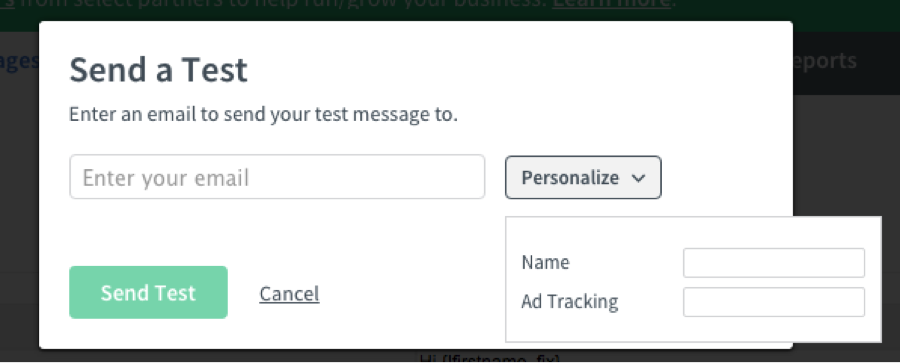
If you need to make changes you can do while it’s in Drafts by clicking the Edit on the right hand side of the screen.
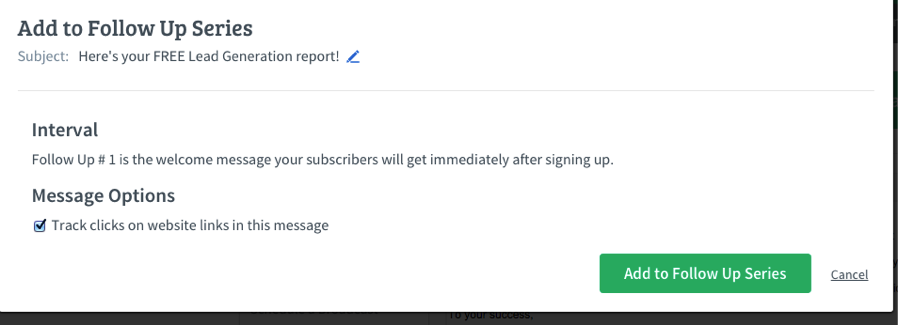
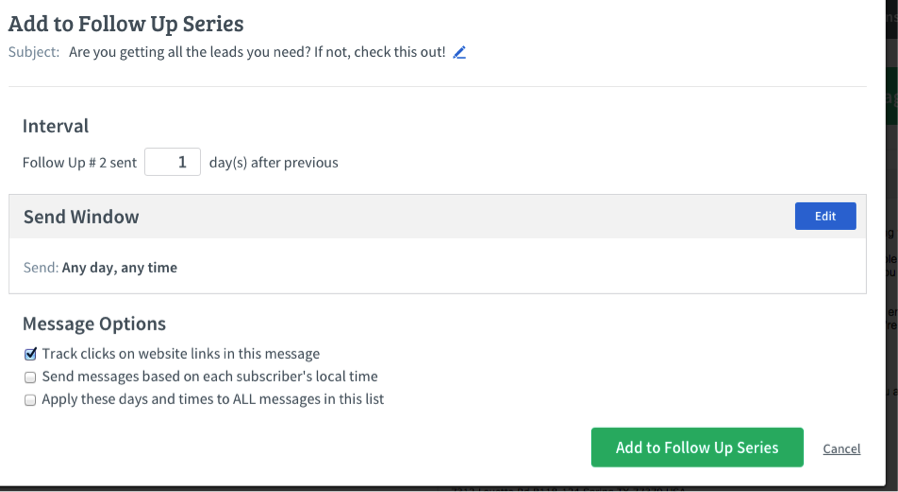
5) Add Drafts to your follow up sequence
After you’ve confirmed that it looks good, go back to your drafts and put the email into follow up series.
The first follow up will come immediately after your prospect confirms the email that comes to them after opting in.
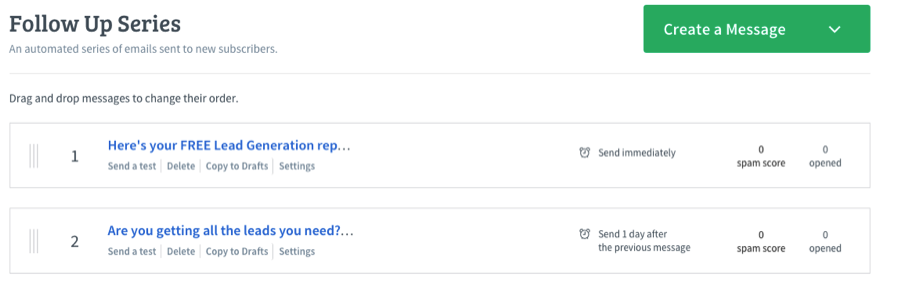
Here’s where you’re follow up sequence is being built. You’ll be able to drag and drop the order if needed.
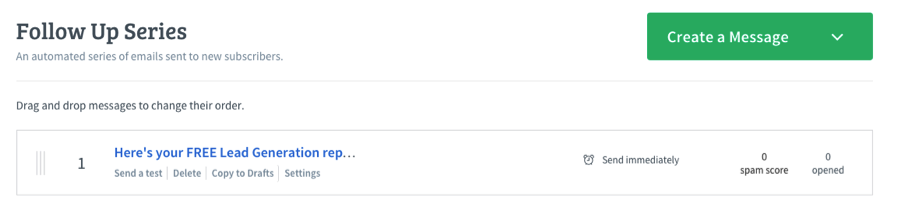
Now for follow up #2 and so on you’ll create another message and follow steps 2-5.
You can choose how many days out you want the next follow up email to go after the previous follow up. My recommendation based on my research is that you’ll want to send it the very next day. However take into account what your CTA was for each previous email. Test it and make sure it makes sense. You don’t want to invite them to a webinar on Wednesday and then send them an email on the Tuesday before thanking them for attending the webinar – you see what I mean? you want to make sure that your recipients can see that you know how to use an autoresponder correctly.
Now let’s check out some of the fun features which can really put your email marketing on steroids.
6) Create a broadcast
You can choose to send out an email whenever you like outside of the regular follow up series. This would be the function you use to get out newsletters, special promotions or just to say hi or introduce your list(s) to something new you have coming up.
You will go through steps 2-4 above but instead of adding to the follow up series, you’ll schedule a broadcast.
You can sync with your Facebook and Twitter.
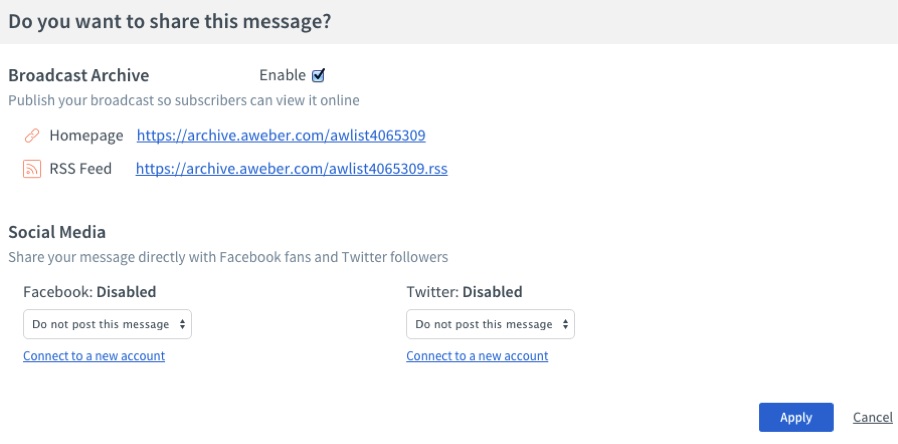
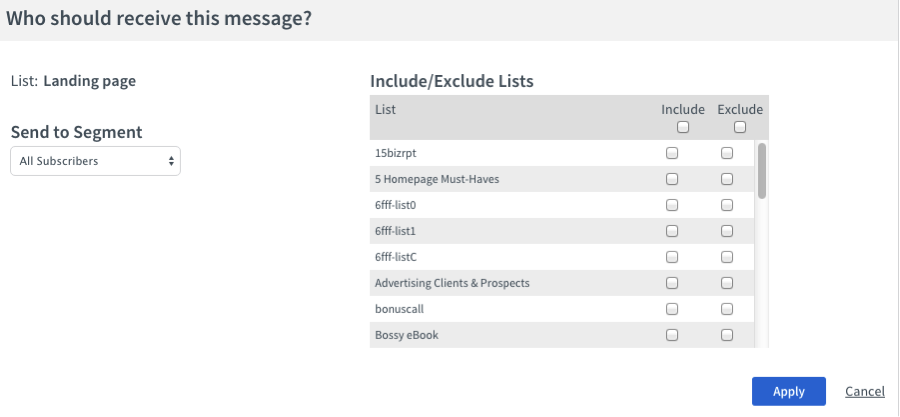
And choose which lists you would like to add to the Broadcast. You will always be working on the List that is showing in the drop down menu at the top of the page you’re working on. Notice, the List I’m on now is Landing page, but I can add any other.

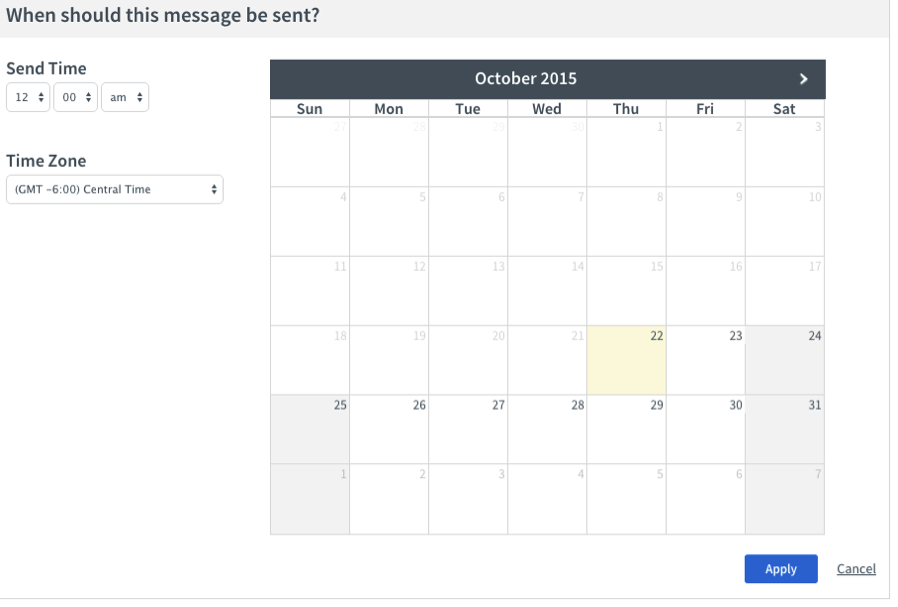
I can schedule it to send in the future. This is a great feature when you want to create the email while you have time, or while it is fresh. Or schedule it when most of your recipients are online, usually lunch or evening for me personally. You can check out Tweeriod to see when your Twitter followers are most active and online.
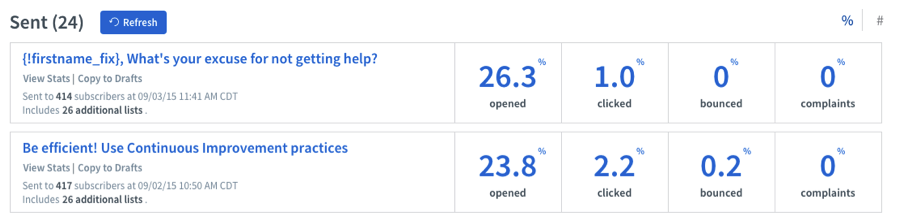
After you have sent your broadcast, you can go in and check out your analytics. It’s fun to start seeing the action. You’ll want to pay close attention to this area and dig in even more as you’re testing and finding what works with your list(s).

7) Put an opt in form on your website using OptimizePress
Go into your Optimize Press Dashboard and Connect your AWeber account.
In order for the opt in box information to populate from your landing page to the AWeber list, you need to create the landing page on your site and get the form script from AWeber.
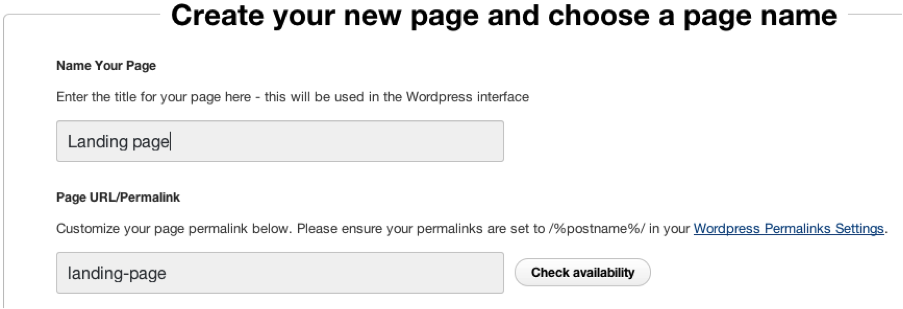
Let’s start with building your landing page with the opt in box.
Choose the name for your landing page.
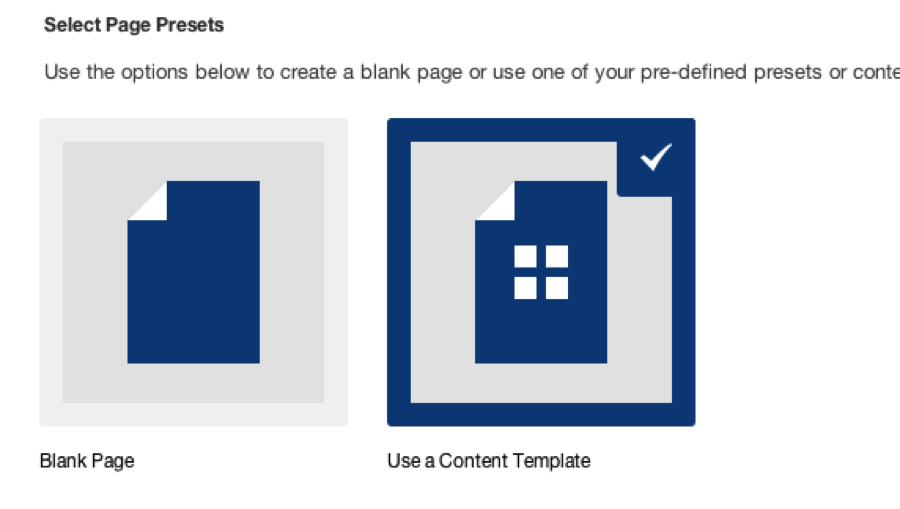
Select the Content Templates because you’ll want to choose from Optimize Press’ great opt in templates.
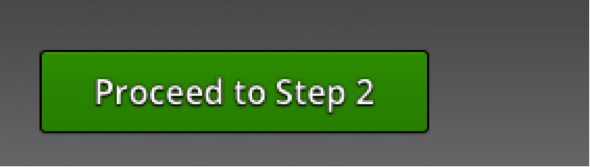
You can choose any of the opt-in pages but choose one that will make sense for what your lead magnet is. They are all customizable, but they’re formatted the way they are for maximum conversions.

After you’ve highlighted the one you want to use, “Proceed to Step 2”.
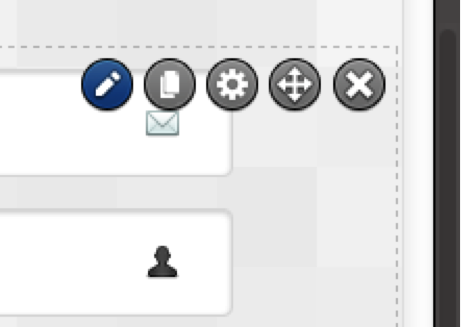
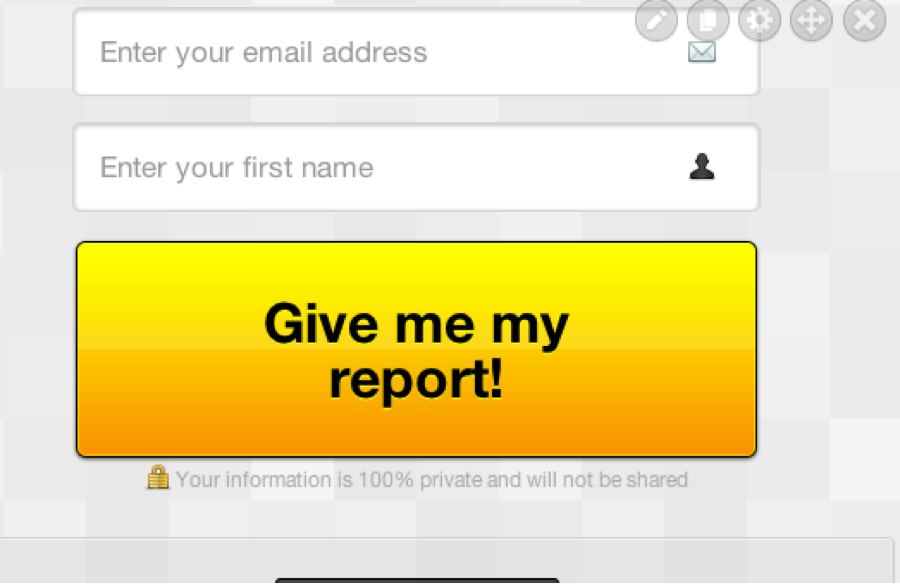
Now to enter the information into your opt-in template box and sync with AWeber.
Click the little pencil to edit the behind the scenes details of the opt-in box.
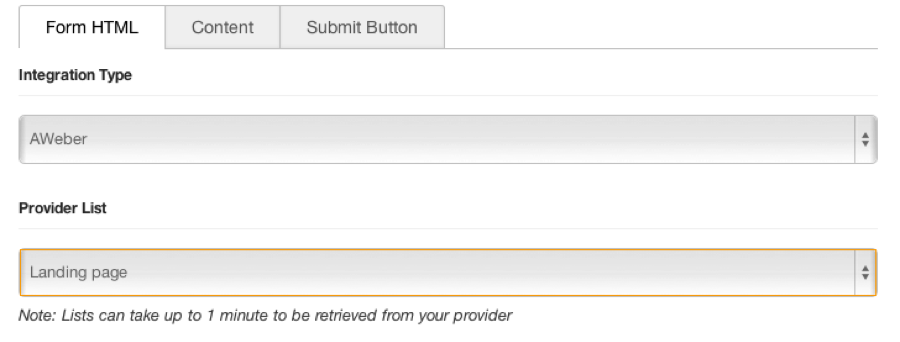
Start with Form HTML and choose AWeber for Integration Type (hint: this is how to use an autoresponder within OptimizePress).
OptimizePress will then populate your Lists and you choose which one you want you signups to go to.
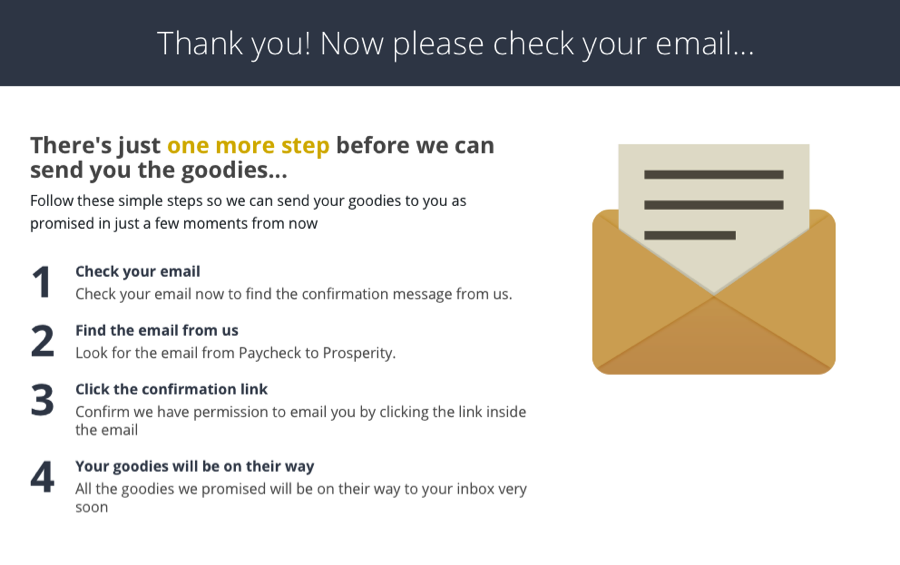
After your opt ins sign up, you’ll want to redirect them somewhere. I personally send them to a “Check Your Email” page where there are instructions about checking their email to confirm their request for info. Remember they need to Confirm their email by clicking the link inside the email you edited in AWeber up in step 1.

The next tab is Content. The main thing here is your Privacy Notice which I change. Studies show the statement I typed below gains more opt ins than the default statement.
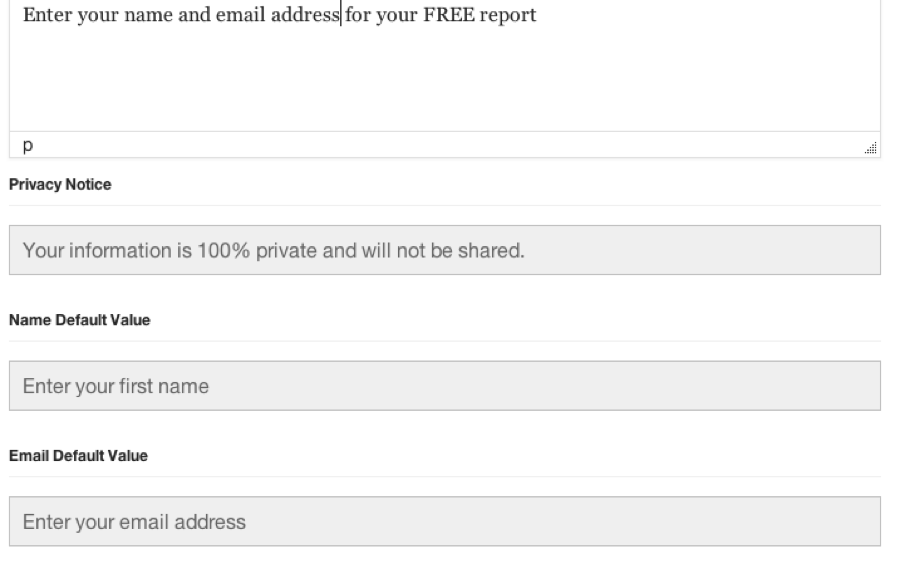
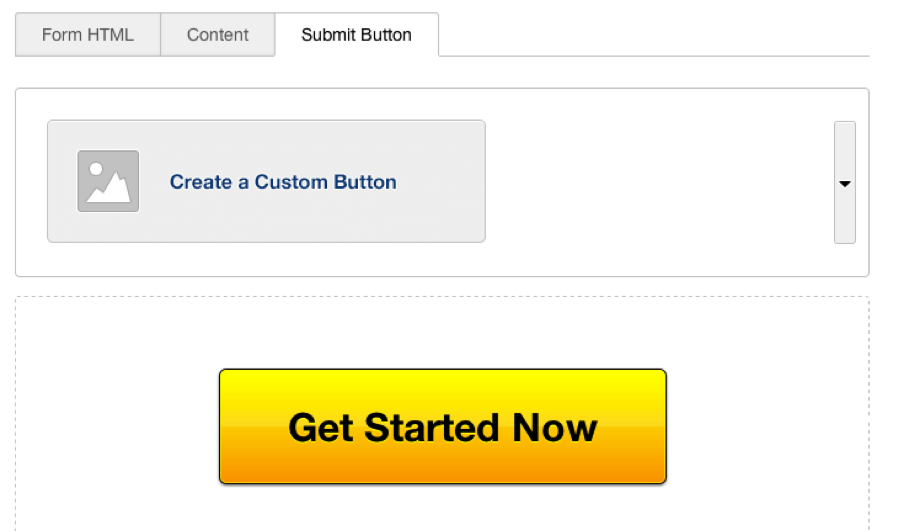
You should change your Submit Button to make sense to what it is you’re offering. If it’s an evergreen video or webinar, you’ll want to say, “Gain Instant Access” or something like that.
In this case, I was giving away a report.
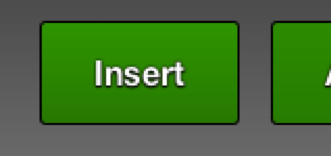
When you’re done, click “Insert” so all your info is populated and ready to go.
I cannot stress enough to test, test and test again. Get a friend to test as well. You don’t want any hiccups or your efforts will be wasted.
If you’d like to send out an email to your list at any time aside from the follow ups, you would repeat step #3 above and instead of “Add to follow up series” you will Schedule a Broadcast.
You can sent a Broadcast immediately or schedule it out to a specific time, particular list and add to your Twitter and/or Facebook.
Pay attention to your analytics. You’ll learn much as you see which subject lines get your emails opened the most and within AWeber. And as you watch your analytics it will show how many people click your CTA. Change it up and test until you are getting about 25-30% open rates and about 3-6% click rates on your CTAs within your email. Learning how to use an autoresponder will put to good use all the hard work you have sent in analytics.
8) Create Automation Rules so you can keep your marketing focused
You don’t really get the full potential of how to use an autoresponder until you are properly utilizing automation. When someone clicks your CTA within your email, they’ve told you that they’re interested in what you are offering. From there, you want to take them to the next step which may be to tell them about your product benefits and pricing.
If someone doesn’t click on your CTA, you would deduce that they aren’t ready yet to see what you have next.
Marketing is changing for these two types of people and where they are in their buyer’s journey. Ultimately you want to lead people to a sale so if they’re not ready yet, you need to lead them there.
You can find out more and get assistance leading your prospects through the buyer’s journey and ultimately to a sale without losing them in the process by scheduling a chat with J Hunter HERE.
In the meantime, you can do your own automation by following the following setup.
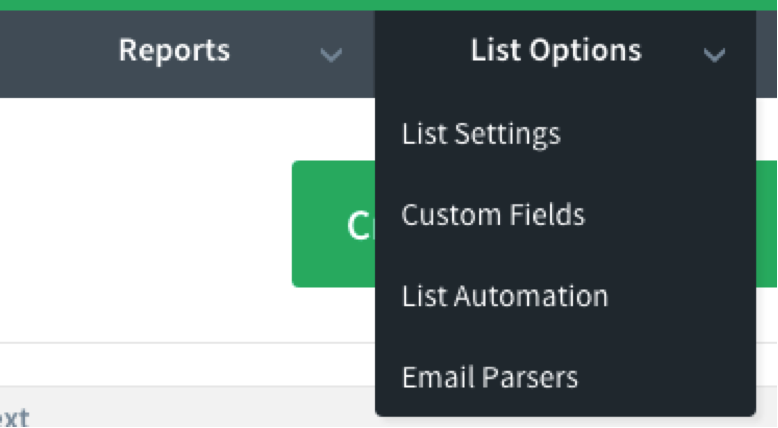
Go to List Options, List Automation.
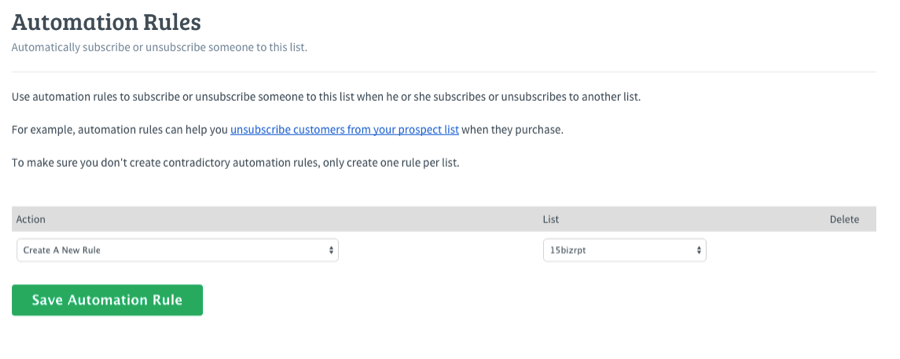
Create a new rule that tells AWeber to add your current subscribers to 1 list to another as they click on your CTA. For instance, when they click on the email which was created within your “Landing page” list, you may want to add them to another list entitled “Lead Generation prospects”. This would put them on a different list of people who may be one step closer to purchasing your product and you would send a different set of follow up series emails – which you would complete by following the same Steps 1-5 above.


Once you’ve saved the automation rule, you’ll of course want to test it. If it flies, then have someone and yourself go through the entire process one last time and you’re ready to launch!
Have a blast and grow your list and your sales now that you know how to use an autoresponder for intelligent email marketing!
TAKE BACK YOUR TIME!
Our team can save you a ton of time and energy that can be better spent elsewhere.
You know that already, that’s why you’re here!
